
We all know most food preparation techniques diminish the nutritional value of the food we eat. From the minimally-prepped (raw, chopped) to the totally killed (deep-fried, overcooked), the range of nutritional degradation is wide. But I bet you didn’t know that there’s a way of preparing your dinner that not only preserves but enhances the nutritional value of your food. Let me introduce you to one of my all-time favorite ways to eat veggies: cultured. A little Picasso with your spinach? No, silly, not that kind of culture. I’m talking about fermentation.
Cultured veggies are veggies that have been naturally fermented through a process called “lacto-fermentation.” When veggies are cultured, their sugars and starches are transformed into lactic acid by micro-organisms, a process that adds loads of beneficial bacteria and amazing enzymes. Fermentation was traditionally used to preserve vegetables and fruits through their off-season. Think of foods like sauerkraut or kim chi. The fermentation process keeps the veggies from going rancid.
There are lots of health reasons to eat cultured veggies:
- They’re already partially digested and packed full of enzymes. This means they’re super easy to digest, and aid the digestion of anything you eat with them.
- They balance the pH of your digestive tract
- They offset the carcinogenic effects of that yummy charcoal you find on anything BBQ’d
- They’re packed with probiotics, which makes them very healing to the digestive tract and great for the immune system
- They help reduce sugar cravings (bonus!)
- They add a really interesting and distinctive taste to your meals.
How do you eat them? Add them to salads, use them as a side or relish with any kind of protein or other veggie, throw them in wraps. You can add them to just about anything savory and they’ll enhance the food and the flavor. The only thing important to remember is to keep them cold – DON’T heat them, or you’ll kill all those great enzymes and probiotics that make them such nutritional powerhouses.
Here’s a video demonstration of how to make them. Or, if that sounds like too much work, look for them in the refrigerated section of your health food store, and look for the words “raw” or “cultured” on the label. The commercially made sauerkraut that’s not refrigerated isn’t the same thing – they use heat, vinegar, and often too much salt.
Cultured Veggies Part 1 – How to make the culture starter
Cultured Veggies Part 2 – Making the veggies
Recipes
Probiotic culture starter
Whey is the liquid remaining after milk has been curdled and strained. It is packed full of probiotics, which can be used as a starter for cultured veggies.
Equipment:
- Big bowl
- Large sieve
- Clean tea towel or cheese cloth
Ingredients:
- 1 large container organic plain yogurt (the best quality you can find)
Line a large strainer set over a bowl with a clean dish towel or cheese cloth (I prefer the dish towel). Pour in the yogurt, cover and let stand at room temperature for several hours (this can take up to 12 hrs).
The whey (clear liquid) will run into the bowl and the milk solids will stay in the strainer. Store the whey in a mason jar in the fridge (keeps for up to 6 months), and the cream cheese in a covered glass container (keeps for about 1 month).
Basic cultured veggies
Makes 2 quarts
Equipment:
- Food processor (not mandatory, but your life will be much easier)
- Big bowl
- 2 quart size wide-mouth mason jars
Ingredients:
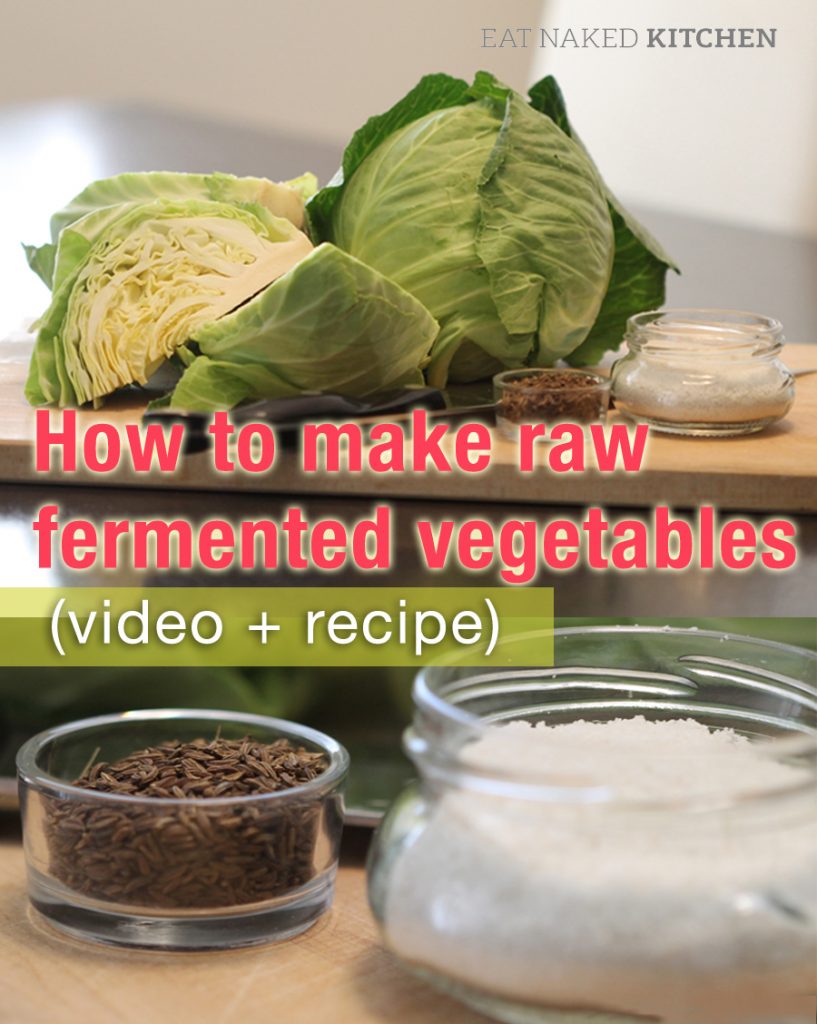
- 1 head green cabbage
- 1 small yam (note: the size I used in the video was way too big and the cultured veg came out a little mushy – use a small one) or 1 carrot
- 4 pieces celery
- 1 bunch radishes
- ½ – 1 tbsp sea salt
- 4 tbsp whey
Put veggies through the food processor on the grate setting to shred. Add to big mixing bowl with the sea salt and whey. Mix thoroughly, squeezing the veggies to release some of their juices.
Pack tightly in mason jars and press down firmly with a pounder or meat hammer until juices are released. The top of the vegetables should be a least 1 inch below the top of the jar. Cover tightly and keep at room temperature for about 3-5 days before transferring to cold storage.


Awesome video, Margaret and Cheffy! When are you getting your own food show?
I have tried to make these before without good results. After watching the video I have a better understanding of what I need to do to make these successfully. Packing down the chopped up veggies into the jar is one thing that I didn’t do the first time! Thank you Margaret.
Thanks for an thorough and thought-provoking education about basic cultured veggies. I know a lot of people who, like myself, want to eat a healthy diet, but lack the information needed to put that plan into action. This video was informative, easy to understand, as well as inspiring. I can’t wait to experiment with all of my favorite veggies.
This is fantastic, Margaret. I really like having a ‘live’ demonstration and can’t wait to make it myself. What other veggies would you recommend using?
This was fascinating. I have strained plain yogurt with cheesecloth before and then threw out the whey. I had no idea that I was throwing out whey or how beneficial it is. I will definitely try this recipe at home. I especially liked the idea of adding it to a salad. Sounds delicious and I can’t wait to try it.
Excellent, Gayle! 🙂
Christi – you can add just about anything – try peppers (spicy ones, too!), brocolli, different kinds of radish, garlic, ginger, red cabbage, carrots, beets…
What a lovely how-to video on those yummy cultured veggies– makes me want to go out and buy a food pro-cessor! 🙂 Goes a lot faster!
Cheffie was especially complimentary and you work well together. Very informative!
I’ve been wanting to make cultured veggies for a while – so glad to have a reliable source so that I can make them now! Such a great video, Margaret and James. Thank you for making the process so easy and fun! A quick question, too: Where does one get a tea cloth/cheese cloth? I don’t think I’ve ever used one of those before..
Leslie – thanks for the great feedback! A tea cloth is Canadian for dish cloth. 🙂 I’m sure you’ve got them hanging around. Even a cloth napkin will do. Most important thing is that it’s clean.
Great video:
I also use unpasterurized miso (soy pasted) from the refridgerated section of the health food store. It can be a bit pricey for a 1lb container anywhere from $5-9 bucks, but a little goes a long way and can literally last for years in the fridge. soy is already fermented from either soy beans, barley, koji spores, brown rice. Good for those that are looking for dairy free. It already has the salt so you can use less. I cover my batch with organic kelp (seaweed) give flavor and again more salt.
I just made a new batch with veggies and fresh sugar cane. Not sure how its going to come out. Looking for the sweet and sour taste.
Great suggestions, Fran. Love the idea of using miso for those who are dairy free. I’ll try that! And I also love the idea of the kelp – I’m always looking for creative ways to incorporate more sea veggies into my meals.
Re: adding vinegars – I guess you could add some but I’m not sure why you’d want to? The veggies are already quite sour. Have you tried this before?
Can you add vinegars like apple cider, rice or balsamic to your veggies after the fermentation is complete and is refridgerated.
thanks for the feedback. re: vinegars, I was thinking of draining the feremented veggies completely. Then I would add different flavor vinegar, like rice vinegar would make it milder, balsamic – sweeter, malt or wine for a different taste. Just a thought, not sure how it would taste or if it would kill the fermentation.
Nice job Margaret and James! Trish
I watched this wonderful video while munching on an omlette with saur kraut. I’m travelling and bougt some at the grocery store. I was hoping it would be a good sbstitute for homeade. Was going to ask you, but you answered my question! And yes, it does have too much salt!
It so nice to have my own go-to girl who answers my queations before I ask them 🙂
Thanks!
Thank you so much for these videos. I have been looking for a recipe that did not include buying starter mix. I didn’t even THINK about using the whey from yogurt, but I eat a lot of yogurt, so this is perfect for me. I’m going to be making some of this as soon as possible. I’m also going to link to this on my Deb’s Health and Fitness site and then also on my Frugal Living site, so people will know how to do this economically without having to buy culture. You rock!
Thanks so much Deb! So glad you found it helpful!
My friend has just introduced me to cultured vegetables and I am thankful for this video. One question though what do you do with the leftover whey.
Hi Jayne, I keep the extra whey and use it for more veg (it keeps for months), or in oatmeal that’s soaking over night, or just a spoonful to aid in digestive discomfort. It’s very soothing.
Thank You Margaret for posting your recipe and your great instruction. I have been making yoghurt for years, and this is an excellent use for the whey. I already have the large mason jars I use to make yoghurt. So glad not to have to invest in expensive starter or equipment, or buy anything else to try this. Got my veggies already too. I am really looking forward to learning this skill and enjoying the results. Will let you know how it turns out.
When you say 4 pieces, do you mean 4 stalks OR 1 stalk cut into 4 pieces?
Also, if I’m fermenting with celery juice can I use the ‘whole processed celery’ (i.e. from a blender that emulsifies the whole piece) OR do I have to use just the juice?
Thanks for you site…it’s wonderful…and thanks for your time, appreciate it/you. 🙂
Ellen
Hi Ellen,
4 pieces = 4 stalks. Good question!
And yes, you can use the whole celery – what you’re wanting here is a medium that will encourage the growth of the good bacteria, and either will do. Thanks for the great feedback on the site. So glad you’re finding it helpful.
🙂 Margaret
Margaret,
Can you add yogurt starter or the contents of acidophilus capsules to get more healthy bacteria into the culture? We currently make cultured veggies and sauerkraut, but I was wondering if this is possible.
Thanks!
I’ve never tried yogurt starter specifically and wouldn’t recommend it – it’s formulated for dairy specifically. I’d either stick with the whey or a cultured veggie starter like that sold by bodyecology.com. You can use the contents of an acidophilus capsule, although i’ve not tried it myself, but you’ve got to watch for all the other fillers, etc. that often come in them. Dr. Mercola is working on a new one right now with Caroline Barringer from Immunitrition.com which uses the probiotics from his line (without any additives) and they’re having great success. i’m not sure when that product will be on the market, but keep watching his site for it. Should be in the next couple of months.
Thank you for the informative videos. I am very new to this and have a couple of questions. Once the fermentation has completed do the vegies have to be stored in the fridge? Additionally, what will cause the fermented vegies to spoil?
Thanks:)
Hi Cathy, great questions. When you store the veggies in the fridge, they stop fermenting because the bacteria get cold and go dormant. You can keep them out of the fridge for a few days, though, without any trouble. This makes them good traveling food (albeit heavy). If the veggies get infected with a mold they can spoil, but if they’re kept in the fridge and if you press them down so that minimal air is contact with them after each use, they’ll last for months. ~ Margaret
Can I make horseradish using this method? This is all new to me.
Hi margaret,
I would love to know how to make cultured yogurt using coconut meat, kefir, vanilla,strawberries and stevia. Erewhon sells one but it is so expensive!!
Just a suggestion for another video! 🙂
That’s a great idea, Sheila. Will definitely do a coconut yogurt in the future. Can’t promise it will have stevia but I’ll make sure it tastes good. For now, check out the blog on how to make your own dairy yogurt. It’s fairly simple and really delicious!
Thanks Margaret Floyd.
Its great video, i ve just started making after viewing video provided by you.
Thanks a lot once again.
Very informative, especially the whey, I wanted to know how to make it without using any commercial starters as I don’t think they are available here in India, thanks a ton!!! Keep up the good work, you give far better presentation that so called pro’s out there, short & sweet, I love it!!!
THANK YOU so much, this is my new project.
In our Russian culture, we regularly consume preserved veggies, specifically sour cabbage; it is know to be the “penicillin” of the kitchen; now i know why!
Thanks guys, this has already got my mouth watering!!! Our garden up here in Oregon is just starting to deliver, and I look forward to lining our shelves with some jars of preserved goodness.
I am very excited to do this today. We have an abundance of cabbage from our garden this year. How do I prepare to store this for long term? is it safe to keep in a cold cellar? Thank you for any imput you can provide.
Hi Pamela – yes it’s fine in cold storage. The colder the better as those little bacteria will keep on doing their thing unless you bring them down to about 38 degrees or lower.
Hi! I’m at work browsing your blog from my new iphone 4!
Just wanted to say I love reading through your blog and look forward to all your
posts! Carry on the superb work!
Hi!
I have been fermenting veggies with whey but would like to try using celery juice.
Can you tell me how to juice the celery and how much is required?
I understand that starter culture is also recommended when using celery juice in order to speed up fermentation.
Do you have a recipe using both the celery juice and culture starter?
Sincerly,
Cynthia
I was researching cultured veggies and vinegar when I found this site. I didn’t see an answer to Fran’s question re whether vinegar will kill the bacteria.
I’ve been making my own yogurt and sauerkraut for a couple of years now and expanded into curried cauliflower (I saw it in a store and figured I could do it myself for a lot less). Next I tried the little green tomatoes in dill and I thought they needed some bite. They taste great soaked in apple cider vinegar, but I hate to think I’m killing off the bacteria. Is there a definitive answer on this?
I can’t wait to try this. Thank you. I just have one question: Can I use the juice of my first batch of cultured veggies to start the next batch?
@Rashelle – that’s a great question and honestly I’ve never tried it but I bet you could. Try it and let us know! You can make sauerkraut from just the cabbage, its juices, and sea salt along with the natural bacteria in the air, so I imagine adding the kraut juice as innoculant would be fine.
Hi Margaret and Chef James,
Thanks for your fabulous information and instructional videos.
I live in the Middle East and I have been unable to find a starter culture and so it’s great to know that I can start with the whey from organic yoghurt. (I now need to find quart jars or some other big glass jar and may need to bring them in from elsewhere).
In your video you said that cabbage is always required to be the base of the ‘salad’. I have an allergy to cabbage and the brassica family as do two of our children. I understand that we may be able to eat these vegetables once they are fermented but before we try that I’d like to increase the prebiotics in all of our guts first. I’d like to start everyone on fermented vegetables and wonder what vegetables you could recommend we start with and can we ferment the veges without cabbage?
Thanks for all your great information!
P.S. Are you on Facebook?
Hi Sarah! Delighted you found this helpful 🙂 Fermentation is actually just traditional “pickling” – so you can do it with just about any vegetable you can think of: beets, carrots, okra, cucumbers… There are loads of good recipes in Sally Fallon’s Nourishing Traditions. With some of the veggies – beets and carrots for example – you want to keep them in big chunks so that you don’t release too many of the sugars, and you don’t need to beat them to release juices like you do with the cabbage. I’d recommend getting a copy of Sally’s book and starting with that because the technique for each vegetable is a little different. Once you’ve got the basics down, you can experiment with different flavors and recipes
Please forget the Facebook question! I’ve found you!
I have a question that has not been answered despite literally hrs of internet research and emails to so called experts.
I am very lactose intolerant and have “leaky gut syndrome” and very severe rheumatoid arthritis as a result so I must not eat dairy which will flare up my immune system.
to be safe and avoid molds which will also flare up this disease if I ingest them, should I use a starter and if so, which one. Body ecology starter is dairy based or so they said when I called them. What should I do? Just make a salt water brine and hope for the best or do that and purchase a Pickler thing to remove the air on top of the mason jar.
Is there a water based kefir that can be used to make pro biotic vegetables like the one used to make pro-biotic drinks? If there is one one, what is it called and where can I purchase it
Please don’t guess or speculate or make a conjecture on this question. Some people with auto immune diseases and who also have severe allergies to molds must not ingest them either dairy or molds or else will get quite sick. What do you suggest I do based on factual knowledge about the best way for me to make pro-biotic vegetables so that I can heal the “leaky Gut sndrome” that is causing this disease of rheumatoid arthritis and environmental allergies and sensitivities. What is the answer to my question which is: If one who is lactose intolerant should hey just use a brine and no starter because there is no non dairy starter to used in making pro biotic vegetables for those people.
I am also intolerant to cabbage and cannot eat sauerkraut but probably could put one leaf on top and remove it later after the vegetables finish fermentation. Do you suggest I make a brine solution and use a single cabbage leaf on top because of the good bacteria they contain and then remove it before I eat the vegetables?
regards – Cynthia
Cynthia – I’d use a brine and no starter. And if you’re intolerant to cabbage, then skip that altogether. You’ll get all the benefits without any cabbage. I’d also start very gently – with just the juice from the fermented vegetables at first and slowly, gradually, build up to the vegetables themselves. I wouldn’t try a kefir for lacto-fermenting veggies because there’s yeast in the kefir and it doesn’t play well with veggies.
Thank you so much for your great video. I wonder if you can use the whey that’s left after making tofu from homemade soy milk to lacto-ferment veggies? Thanks!
@Judi – I’ve never tried it but you can try and see what happens? I’m assuming the tofu you’re making at home is fermented? If it’s fermented, you could try it. If not, then it wouldn’t have the live bacterial cultures in it required to be considered a culture starter.
Hi and thanks for the great video! I’m raw vegan so was wondering if anyone could recommend something besides the yoghurt whey or any other commercial starter?
Thanks!
I would just add the sea salt and let it culture “wild”. There are bacteria in the air that will ferment it – it just may take a few extra days and the results aren’t quite as controlled/predictable. A great resource is Sandor Felix Katz’ book “Wild Fermentation“
Is there a way to ferment vegetables that is salt free,dairy free and rice free? Thanks.
It’s easy to omit the dairy and rice (have never actually heard of using rice before?) but hard to eliminate the sea salt. Why do you need to?
How pleased I am to learn today the technique for fermenting vegetables. I am currently involved in a long session of chemo with a return of breast cancer. All the benefits of restoring the gut flora and nourishing the body are driven home by anything I read about my recovery. Thanks both of you for the journey you have taken!
This is an answer to prayer. Your recipe is much easier than the ones I’ve found elsewhere. It gives me confidence to start this week. Fermented foods are an important component that’s been missing in my diet. I could do this weekly!
So glad you’re feeling inspired Lesli! Keep us posted how it goes. You can do it!
Dear Margaret,
I followed your video recipe and “thought” I left enough room at the top…..it was at least an 1” from the top, but by day #2, the liquid was coming out of the top all over the counter, I opened the jar and dumped a little liquid out and left back on the counter (at the time it was bubbling) but then stopped after I took out some liquid……..today is day 4 and I put the jar in the fridge, but now I am afraid I may have screwed things up? Is it safe to eat now??? Please Help!
Thank you!
Candi
Hi Candi, Usually seepage is normal. When you poured liquid out, was the cabbage still covered? You’ll need to go by taste. The veg should taste pickled and slightly sweet. If you really want to be safe, check the pH of the veg with a pH strip. Fermented food needs to reach a pH level of 4.6 or lower (which indicates it is acidic enough to be safe). Fermentation, if done properly, will bring food to the “safe” acid level.